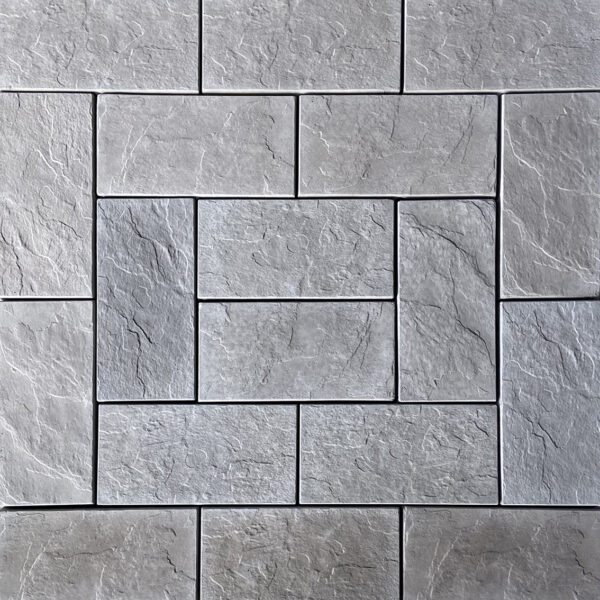
Everything You Need to Know About Graphite Pavers
Picking the right pavers for your backyard can feel like a proper headache. You want something that looks the part, survives a brutal Aussie summer, and doesn’t turn into a scorching hotplate the second you step on it barefoot. Then there’s the cost, the upkeep, and the nagging worry that you’ll pick the wrong thing and regret it every time you fire up the barbie.
Sound familiar? You’re not alone.
This one’s for you — the homeowner ready to give your outdoor space a proper glow-up without the guesswork. By the end, you’ll know exactly what Graphite pavers are, how tough they really are, what they cost, how they go down, and how to keep them looking sharp. No fluff. Just the good oil so you can make a confident call.
Let’s get into it!
So, What Exactly Are Graphite Pavers?
Think of a graphite paver as a slab of concrete that’s been given a rich, moody charcoal-grey colour baked right through it. The “graphite” name comes from that deep, smoky tone — a bit like the pencil lead you used at school, only way classier.
Here’s the easy way to picture it. Some cheaper pavers are like a painted rock: the colour sits on top, and once it chips or fades, the plain grey underneath shows through. Better graphite pavers have the colour mixed all the way through the concrete, like a choc-chip biscuit that’s chocolatey top to bottom. Scratch it, chip it, wear it down — the colour stays.
That dark, elegant look is why you’ll spot them everywhere from Melbourne courtyards to modern Sunshine Coast poolsides. They pair beautifully with timber decking, greenery, and those big glass sliding doors so many new Aussie homes have.
Graphite Pavers: Key Characteristics
| Characteristic | What to Consider |
|---|---|
| Colour | Dark grey to charcoal or graphite tones |
| Appearance | Can create a contemporary, understated outdoor look |
| Surface finish | Check the specific product for smooth, textured, honed or other finishes |
| Size | Available sizes depend on the individual paver range |
| Shape | Commonly rectangular or square, depending on the product |
| Application | Choose a product designed for the intended application |
| Maintenance | Requirements depend on the paver material and surface finish |
| Slip resistance | Check the manufacturer’s technical information for the intended wet-area application |
| Heat | Darker surfaces can become hot in direct sun, so consider the location and intended use |
| Colour variation | Natural and manufactured pavers can have variation between batches |
How Tough Are They Really? (Durability)
This is the big one. Aussie weather doesn’t muck around. We cop blazing summers, sudden downpours, salty coastal air, and in some spots, frosty winter mornings. Your pavers need to handle the lot.
Good news — graphite pavers are seriously hardy!
Concrete pavers like these are built to take a beating. They handle heavy foot traffic, dropped cricket balls, dragged outdoor furniture, and the weight of a fully loaded barbie without cracking a sweat. Many are rated for years of wear, and because that colour runs all the way through, they don’t get that tired, patchy look over time.
Here’s a quick hypothetical to bring it to life. Imagine the Nguyen family in Brisbane. They’ve got three kids, a dog, and a pool. Their old pavers had faded to a sad, blotchy grey and one had cracked clean in half. They switched to graphite pavers. Two summers of pool parties, muddy paws, and dropped snags on the ground later — the pavers still look brand new. That’s the kind of toughness we’re talking about. (This family is made up, just to paint the picture!)
One thing to keep in mind, though — and let’s be straight with you here. Dark surfaces soak up more heat than light ones. On a stinker of a 40-degree day, a graphite paver will feel hotter underfoot than a pale sandstone one. If you’ve got a pool or an area where the kids run around barefoot, chat to your supplier about heat-reducing finishes or plan a bit of shade. A pergola or a leafy tree can make a world of difference.
Where Can You Use Graphite Pavers
| Application | Why Graphite Pavers May Be Considered |
|---|---|
| Patio | Creates a defined outdoor entertaining area |
| Courtyard | Works well with contemporary landscaping |
| Pathway | Provides a consistent paved walking surface |
| Pool area | Can create a strong visual contrast, subject to suitable slip-resistance requirements |
| Outdoor entertaining area | Complements modern furniture and landscaping |
| Garden areas | Dark paving can contrast with plants and greenery |
| Driveway | Only use a product specifically rated for vehicular traffic |
| Commercial landscaping | Can provide a consistent contemporary finish where the selected product is suitable |
Do They Give You Bang for Your Buck? (Cost-Effectiveness)
Let’s talk money, because that’s what it comes down to for most of us.
Graphite pavers usually sit in the middle of the pricing pack. They’re generally cheaper than natural stone like bluestone or granite, but a touch dearer than the most basic plain concrete. Fair enough — you’re paying for that colour-through quality and the fancier look.
Here’s why they’re often the smart pick for your wallet in the long run. Because they’re so tough and the colour doesn’t fade, you’re not forking out to repair or replace them every few years. Cheaper pavers can save you money today and cost you more down the track. It’s a bit like buying decent work boots instead of thongs for a big job — the good ones just last.
Picture this made-up example. Two neighbours in Adelaide both redo their patios. One goes for the cheapest pavers going. The other picks graphite. Five years on, the first neighbour’s pavers are cracked and faded, and they’re saving up to redo the whole lot. The graphite patio next door still looks a treat. Over time, the “pricier” choice actually worked out cheaper. (Totally hypothetical, but you get the gist!)
Add in the value a good-looking outdoor area brings to your home if you ever sell, and graphite pavers earn their keep.
Getting Them Down: Installation Tips
You can absolutely take this on as a weekend project if you’re handy, but it pays to know what’s involved first.
| Stage | What Happens |
|---|---|
| 1. Site assessment | The area, levels, drainage and intended use are assessed. |
| 2. Set-out | Paver layout, edges, levels and falls are planned. |
| 3. Excavation | The required area is excavated to the appropriate depth. |
| 4. Base preparation | A suitable base is installed and compacted. |
| 5. Bedding | The specified bedding layer is prepared. |
| 6. Paver laying | Pavers are positioned according to the planned layout. |
| 7. Cutting | Edge and detail cuts are completed where required. |
| 8. Jointing | Appropriate jointing material is installed. |
| 9. Compaction | The finished surface is treated according to the paver manufacturer’s requirements. |
| 10. Final inspection | Levels, joints, edges, drainage and finish are checked. |
Here’s the simple version of how pavers go down:
- Prep the base. This is the most important bit! You dig out the area and lay down layers of crushed rock (called road base) and sand, all compacted down firm and flat. A wonky base means wonky pavers.
- Get the slope right. You want a gentle slope so rainwater runs away from your house, not towards it. Even a tiny slope does the job — think of it like tilting a plate so water rolls off the edge.
- Lay the pavers. Set them on the sand, keeping even gaps between each one. A rubber mallet helps you tap them level.
- Fill the joints. You brush fine sand into the gaps to lock everything in place snug and tight.
Easy enough to follow, right?
That said, here’s some honest advice. If your area’s big, sloped, or heading up to a pool, getting a professional in is money well spent. A dodgy base is the number one reason pavers fail, and fixing it later is a proper pain. There’s no shame in calling a pro — even seasoned renovators do it for the tricky jobs.
Quick fictional scenario. Dave from Perth reckoned he’d save a few bucks and rush the base prep on his back patio. Skipped the compacting, went light on the road base. Six months later, half his pavers had sunk and pooled water every time it rained. He ended up pulling the whole thing up and starting again. (Made-up Dave, real lesson — take your time with the base!)
Graphite vs Other Paver Colours
| Paver Colour | Visual Effect | Common Design Style |
|---|---|---|
| Graphite | Dark, contemporary and strong | Modern / contemporary |
| Charcoal | Deep and neutral | Modern / industrial |
| Light Grey | Bright and versatile | Contemporary / minimalist |
| Beige | Warm and natural | Traditional / coastal |
| Cream | Light and soft | Coastal / classic |
| White | Bright and high contrast | Contemporary / luxury |
| Terracotta | Warm and earthy | Mediterranean / traditional |
Keeping Them Looking Ace: Maintenance
Here’s where graphite pavers really shine. They’re refreshingly low-fuss!
For everyday cleaning, a good sweep and a hose-down does the trick. Spilled some sauce during the Sunday barbie? A bucket of warm soapy water and a stiff broom will sort it. For a deeper clean once or twice a year, a pressure washer on a gentle setting brings back that fresh look.
A few simple tips to keep them at their best:
- Seal them. A quality sealer is like sunscreen for your pavers. It helps repel stains from oil, wine, and food, and makes cleaning even easier. Reapply every couple of years.
- Deal with spills quickly. The sooner you clean up a spill, the less chance it has to leave a mark.
- Pull weeds early. The odd weed might pop up in the joints. Whip them out while they’re small and they won’t bother you.
And that dark graphite colour has a sneaky bonus — it hides dirt and marks far better than pale pavers. Less obvious grime between cleans means less nagging in the back of your mind.
The Bottom Line
Let’s wrap up what we’ve covered.
Graphite pavers are a tough, good-looking, mid-range choice that stands up brilliantly to the Aussie climate. That deep charcoal colour runs all the way through, so they keep looking sharp for years. They’re kind to your budget over the long haul, they’re straightforward to install if you nail the base prep, and they’re a breeze to maintain.
The one honest catch? Being dark, they hold more heat, so plan a bit of shade if barefoot comfort matters to you.
For most homeowners chasing a modern, stylish, hard-wearing outdoor space to enjoy those long summer evenings, graphite pavers are a cracking option.
If you’re weighing up your choices and want a hand matching the right pavers to your space, budget, and how you like to use your backyard, the team at Company Name is always happy to talk it through — no pressure, just honest advice to help you get it right the first time.
Now go on — that dream outdoor space is closer than you think!
Graphite Pavers: Questions to Ask Before Buying
| Question | Why It Matters |
|---|---|
| What material are the pavers made from? | Material affects performance, appearance and maintenance. |
| Are they suitable for my intended application? | Different areas have different performance requirements. |
| What slip-resistance rating do they have? | Important for wet and pedestrian areas. |
| Are they suitable for vehicles? | Not every paver is designed for vehicular traffic. |
| What sizes are available? | Size affects layout and installation. |
| What finish is available? | Surface finish affects appearance and performance. |
| Do colours vary between batches? | Important when ordering additional quantities later. |
| Do they need sealing? | Requirements vary by material and product. |
| How should they be cleaned? | Incorrect cleaning methods can damage some surfaces. |
| What installation method is recommended? | Correct installation affects durability and performance. |